If you are using Serverless Framework, it already has a built-in preview deployment feature with Serverless CI. You can read A Guide to Preview Deployments with Serverless CI/CD for more information.
 Serverless Dashboard - CI/CD settings
Serverless CI supports GitHub and Bitbucket out of the box and you can manage it from Serverless Dashboard by going to your project’s CI/CD settings.
In this post, you will be reading about how to implement preview deployments by using GitLab CI/CD. The setup may change depending on your requirements so this will be just a simple example regarding how to achieve this integration. I will assume that you have a basic understanding of GitLab’s CI Jobs.
serverless.yml initial setup
We will be using custom domain manager plugin serverless-domain-manager to build our preview domains as well as staging and production domains.
yarn add serverless-domain-manager or npm i serverless-domain-manager
Adding custom domain settings
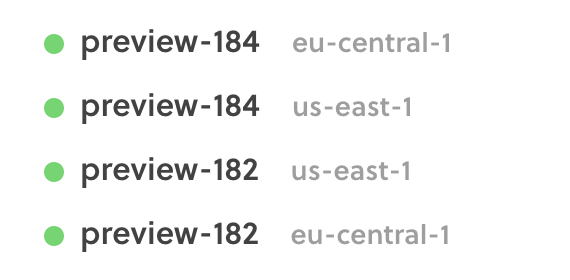
We will have four targets for the type of domain names: production, staging, preview and local. Each preview deployment will be a different stage and you will be seeing them like this on Serverless Dashboard:
 Preview deployments as stages
The domains will be created in these formats regarding their stages:
Domain target: production
Stage: production
Domain: production-api.myapp.org
Domain target: staging
Stage: staging
Domain: staging-api.myapp.org
Domain target: preview
Stage: preview-1
Domain: preview-1-api.myapp.org
(1 is your merge request ID coming from GitLab’s predefined variables)
Addition:
| |
If you would like to have multi-regions, you can expand customDomain with these options:
.gitlab-ci setup
Now we have our serverless.yml ready (assuming that you have completed the rest of settings for your needs such as functions, etc.), we can start building our GitLab CI/CD file.
We will create a .gitlab-ci file and add a deploy stage. When a merge request is created, we will automatically deploy our preview deployment eu_preview_deployment with two main commands:
DOMAIN_TARGET_TYPE=preview serverless create_domain --stage preview-${CI_MERGE_REQUEST_IID} --region eu-central-1
and
DOMAIN_TARGET_TYPE=preview serverless deploy --stage preview-${CI_MERGE_REQUEST_IID} --region eu-central-1
Domain target type is retrieved from environment variables as you can see. The first one creates the domain, the second one deploys the application. Here, you can give any name to your stages. It doesn’t have to start with preview.
After our merge request is closed or merged, we will be calling our job stop_eu_preview_deployment which is referred by eu_preview_deployment in environment.on_stop: stop_eu_preview_deployment. Both of the jobs must be in the same environment.
The stopping job will call two commands:
DOMAIN_TARGET_TYPE=preview serverless delete_domain --stage preview-${CI_MERGE_REQUEST_IID} --region eu-central-1
and
DOMAIN_TARGET_TYPE=preview serverless remove --stage preview-${CI_MERGE_REQUEST_IID} --region eu-central-1
The first one will remove the custom domain, and the second one will remove the preview deployment.
| |
That’s it… Now you have a preview deployment setup.
As an example, I will add staging and production deployment setups for .gitlab-ci.yml:
| |
You can change the rules of the setup regarding your needs. You can read more about .gitlab-ci.yml keyword references in the GitLab docs. You can also change the stages and everything as you wish.
I hope this small tutorial will give you an idea regarding preview deployments on GitLab. Let me know if you have a better approach. :)
This article was written by Emin Buğra Saral.